Diy Door Casing / Let us know in the comments!find.
byAdmin-
0
Diy Door Casing / Let us know in the comments!find.. Let us know in the comments!find. A roughed in doorway (with the 2 x 4's showing) is generally not perfectly level, so you have to use wood shims while installing the door facings to get it perfectly straight. Next, attach the hinges to the door casing. The fillet, a 1x6 and the cap molding. We've been done with this project for a couple of months, but picture taking has been on the back burner.
And then it was time for the topper.. Next, attach the hinges to the door casing. Start with the header the header is the piece that goes at the top of the door. Otherwise, installation should be a fairly simple task. Next, attach the 1x4 header piece flat against the wall above that.
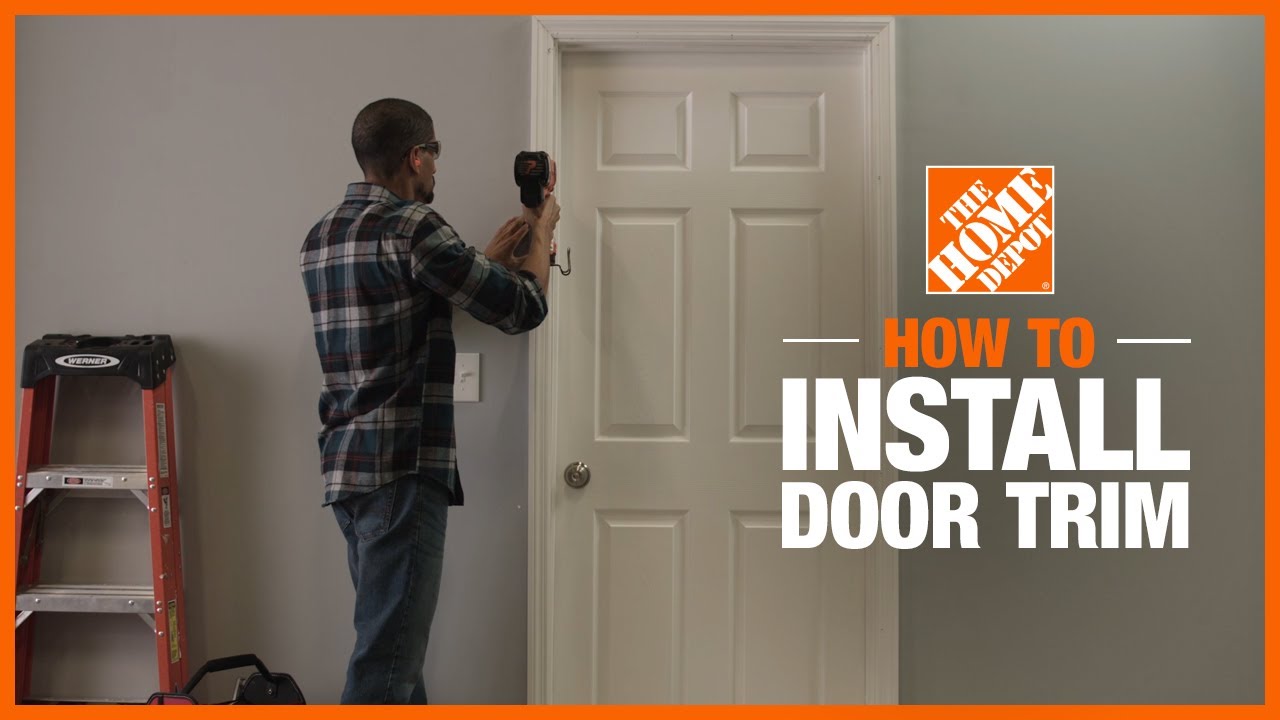
How To Trim A Doorway The Home Depot from i.ytimg.com Door headers typically (but not always) have a small ledger board first (that slightly overhangs the door. This door trim is overbearing and inappropriate in homes with a cleaner, more modern style. In order to achieve this, i had to remove the base boards around the base of the door frames. Before you begin the actual installation of the door trim, you should measure attentively the perimeter of the door. Installing door casing is a fun and easy diy project, provided you have the right tools and materials. This diy craftsman door casing is a great diy project and will make your home look amazing! Choose from a wide variety of profiles and colors to add depth and detail to any ceiling, door, window, wall, or floor. Cut the length of the short point to short point of the miters to be about 1/2″ longer than the inside
To replace door casing, such as brick mold:
Paint your door casing and allow them to dry before you start installation. Start with the header the header is the piece that goes at the top of the door. It's made up of a 1 by 2 on top, a piece of the 1 by 4 in the middle and a piece of lattice (1/4 by 2) on the bottom. Diy door store has everything you need for easy repairs offering affordable prices on replacement parts and hardware for a variety of interior and exterior doors. One major way we wanted to do this was with our trim work. Next, add the interior molding to the door frame and allow the edges of the frame to be free. Let us know in the comments!find. We wanted the doors to feel really grand. After virtually rummaging through trim photos on pinterest, i decided i wanted casings and baseboards that were quite square, and i wanted to keep the profile simple with just a bit of detail at the top and bottom.it had to be something we could diy, but. Before you begin the actual installation of the door trim, you should measure attentively the perimeter of the door. Diy craftsman door casing with corbels today, i am showing you how to not only case out a door frame in a timeless craftsman style, but we are even going to add some simple classic corbels to give it a little something extra. Door casings are both decorative and utilitarian, enhancing the look of the door while also concealing the transition between the wall and the jamb. For the trim piece you used to cover the gap, you should probably continue the trim past the mdf backer board with a return like you did on the crown portion, so it slightly goes past the existing casing and 45's back into the wall.
It's made up of three parts: Diy door store has everything you need for easy repairs offering affordable prices on replacement parts and hardware for a variety of interior and exterior doors. Installing the door casing step 1. Making the right cuts ensures the finished woodwork is well fitted and tidy. Use a utility knife to cut through the paint and caulk where the casing meets the door jamb, siding, and miter joint.
31 Best Interior Exterior Door Trim Ideas Sebring Design Build from sebringdesignbuild.com Just because a home is small does not not mean it can. A roughed in doorway (with the 2 x 4's showing) is generally not perfectly level, so you have to use wood shims while installing the door facings to get it perfectly straight. Start with the top piece, shim and level, and then nail into place. Now adding casing to your doors is an easy project for beginners, but because you are a novice, take your time and do it right. Inteplast moulding is designed to be low maintenance, easy to install, and ideal for areas where moisture is a concern. Scrape off any extra caulking on the door jamb and walls with your chisel. This diy craftsman door casing is a great diy project and will make your home look amazing! Start with the header the header is the piece that goes at the top of the door.
Install the door inside the jamb frame by assembling the hinges.
Use a utility knife to cut through the paint and caulk where the casing meets the door jamb, siding, and miter joint. Diy craftsman door casing with corbels today, i am showing you how to not only case out a door frame in a timeless craftsman style, but we are even going to add some simple classic corbels to give it a little something extra. But while it minimizes seams. When complete, you should have a door frame without a bottom piece. Get started by removing your old trim using a chisel and hammer. How to install chair rail: {diy door casings}…the easy way. The fillet, a 1x6 and the cap molding. Feb 17, 2013 by admin. Trimming a door is a diy project you could complete in an afternoon. These trim pieces, though plentiful, still tend to be rather costly. Choose from a wide variety of profiles and colors to add depth and detail to any ceiling, door, window, wall, or floor. Steps to diy your door trim.
And although it was a pretty easy project, it did seem to take us a long time. And then it was time for the topper.. Diy door store has everything you need for easy repairs offering affordable prices on replacement parts and hardware for a variety of interior and exterior doors. Start with the header the header is the piece that goes at the top of the door. {diy door casings}…the easy way.
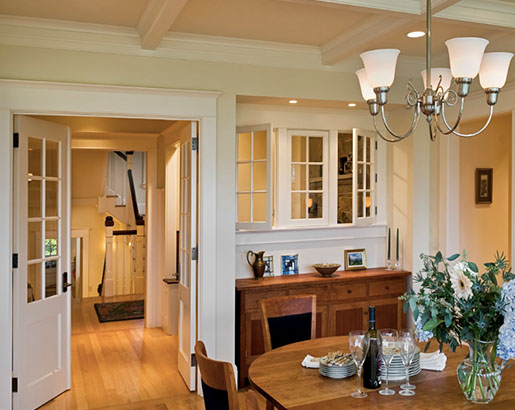
French Door Makeover Part Two Diy Door Casing Heart Filled Spaces from heartfilledspaces.com This will allow the door to swing. Steps to diy your door trim. When complete, you should have a door frame without a bottom piece. The final step for both the door and the window trim is building and installing the head casing assembly. Then shim and level the side pieces and nail them into place. Installing the door casing step 1. Place the head jamb over the top ends of the side jambs. Start with the top piece, shim and level, and then nail into place.
Making the right cuts ensures the finished woodwork is well fitted and tidy.
You see, if we can't live in an area that this comes. Door headers typically (but not always) have a small ledger board first (that slightly overhangs the door. But while it minimizes seams. Installing door casing is a fun and easy diy project, provided you have the right tools and materials. This guide will show you how to trim a doorway. Scrape off any extra caulking on the door jamb and walls with your chisel. To replace door casing, such as brick mold: Use a flat pry bar to remove the door casing, being careful not to damage adjoining surfaces. For the trim piece you used to cover the gap, you should probably continue the trim past the mdf backer board with a return like you did on the crown portion, so it slightly goes past the existing casing and 45's back into the wall. And although it was a pretty easy project, it did seem to take us a long time. Out with the old and in with the new! I put it together using wood glue and the nail gun. Just because a home is small does not not mean it can.